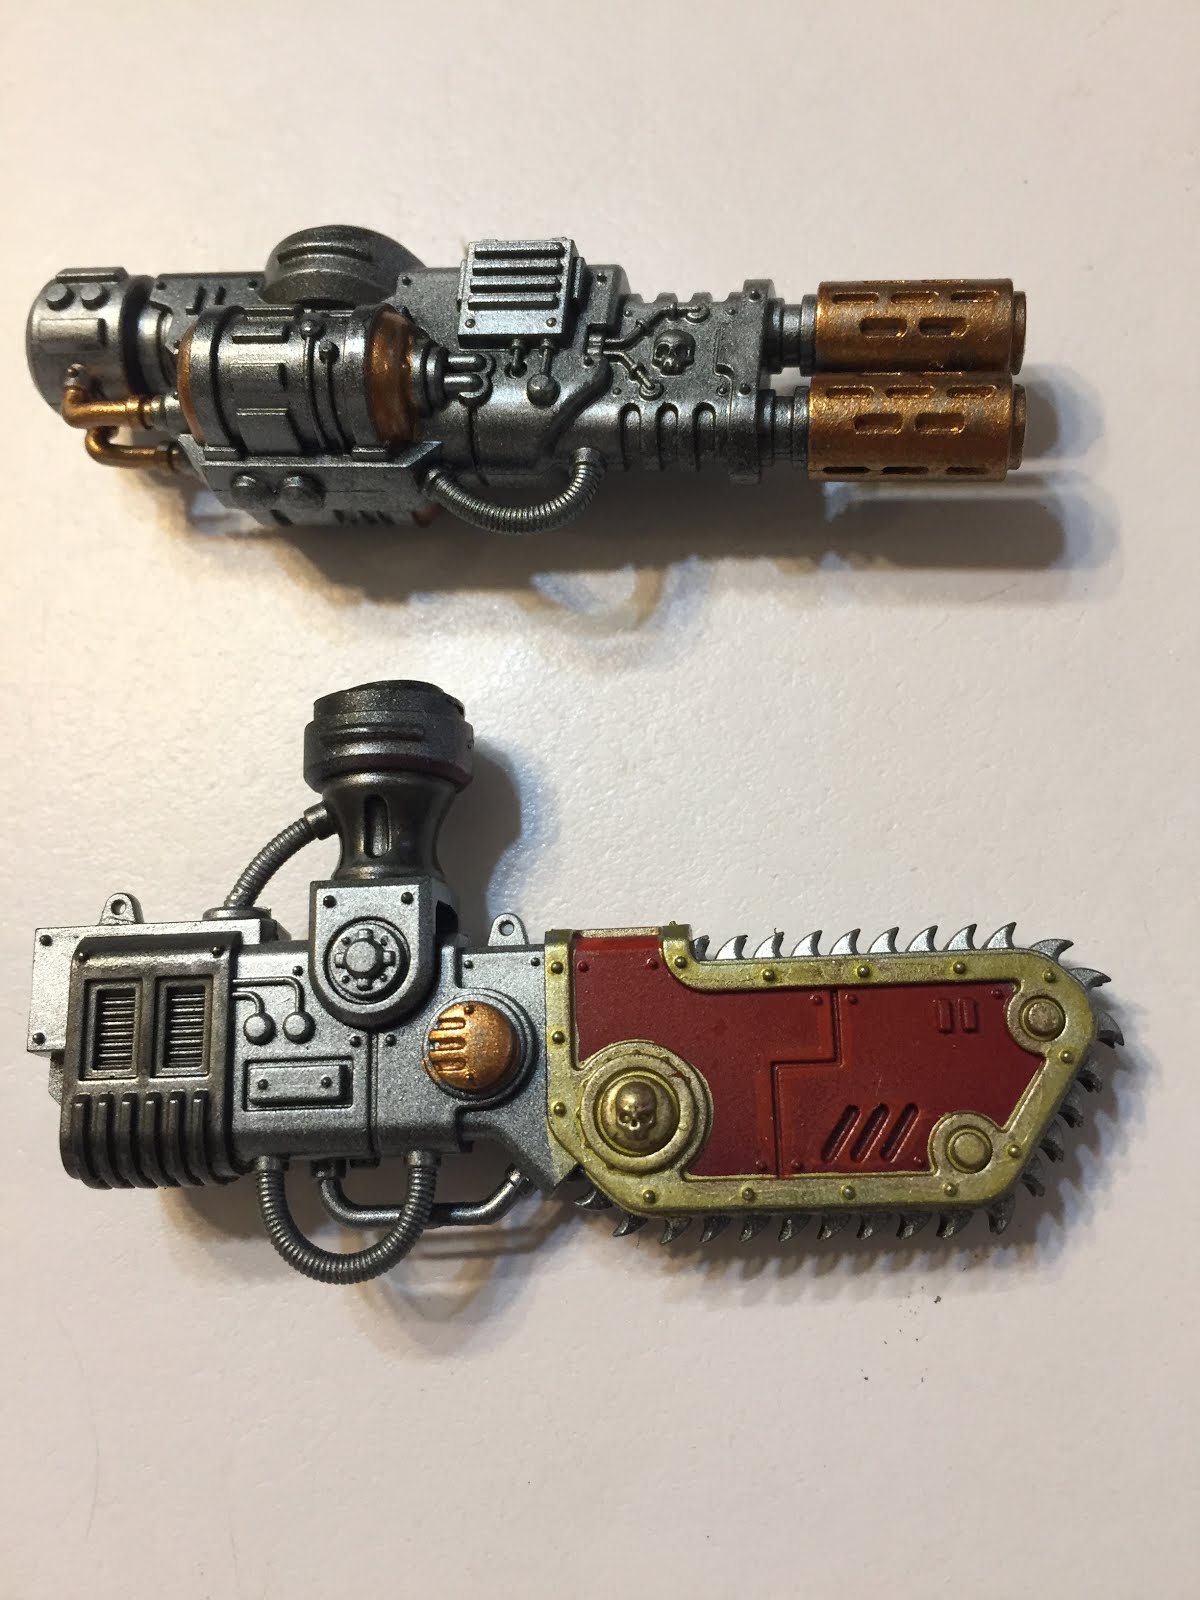
After some delay, I'm happy to present the Imperial Knights Work in Progress Part III. This installment will cover the work to date on the Knights, including base coat details, initial highlights, and my favorite step of the process, the Oil Wash. At this point, the Knights are about 90% done, all that's left to do is final highlights, decal transfers, and some minor weathering.
I also tried out a new line of products during this stage, the Vallejo Metal Color line of metallic paints; I'l give a brief review of working with those below.
 Base Coat Details
Parts I & II described the process of airbrushing the major surface areas; the metallic gears and the colored armor. There's a few more base colors we need to apply before moving on; these are in small detailed locations so we'll use the brush on them instead of spraying. Specifically, the gilding around the armor plates. I chose to use both chrome and gold on various knights for these areas, as I think both look really good in the House Griffith color scheme.
This process is the single most time consuming process of the project. Go only as fast as you feel comfortable doing; since we're past the airbrush stage for the armor plates, any mistakes you make here will need to be touched up on the finished airbrushed armor; careful = slow.


For the Knights and Armiger armor gilding I used
Vallejo Metal Colors airbrush colors Gold and Chrome. Although these are specifically made for airbrush, their coverage is pretty good with a normal brush as well. Most of the detailed parts needed just a single coat, the large areas needed 2 or more coats - however, later in the project , I will be applying a final highlight coat on the large areas with the airbrush, so I was not overly concerned with the final coverage of these metals.
Since the Vallejo Metal Colors are extremely thin, you might want to use a practice piece before applying them to your detail areas. The thin consistency will spread quickly, and any overload on the brush will quickly run into place you may not want it. Once you do have an appropriately small/dabbed amount of paint loaded on your brush, though, that thin consistency will do a lot of the work for you and overall was a smooth product to work with. An additional benefit of using these ultra-thin paints was the long open time on your palette - I've always had issues with metallic paints drying too fast, on even a wet palette.
The sheen of the metallic, especially the chrome, is very bright and reflective. Although I'll be deadening that bit in this step, I will eventually be re-applying these colors in the large areas in Part IV, so the sheen with be bright again.
Overall, I think these Metallic paints are great and I see no reason not to always use them.
Some spot base colors are applied elsewhere, like the Steel / darker metallic on various areas of the gears, but that's about it. Now it's on to highlighting.
Highlights
The process I like to use for shading my pieces is to do highlighting first, varnish, then apply an oil wash. So basically what we're doing here is preparing the model to be shaded. Your process may be in reverse, especially if you like to use color-altering methods like GW Shades or Inks before you highlight. I'll describe why I like the oil wash method more below.
On the Knights, the highlighting mostly involves edge highlighting on the colored armor. This is one of the easiest and most effective types of highlighting you can do with a model. Similar in principle to drybrushing, but much less messy and a much cleaner final look (I never drybrush anymore). For the white/cream armor, I used vallejo Ivory paint. Though this paint is naturally very thin out of the bottle, using on a wet palette will continuously give you the consistency you want - very thin on a size 0 brush. Holding the brush at an angle, drag the brush along the raised edges anywhere you find them, so that the physics of the angle will limit and guide your brush stroke to color only the edge.
Repeat with select areas of red and blue as needed. I did not do any highlights of the bare metal areas at this stage, since we'll be tackling that in final highlights.


 Oil Wash
If you have not yet experimented with oil washes yet, I highly recommend them to shade your models for several reasons. First and most importantly is the quality of the final product. Black oil paint will be the deepest black color you can apply, and make all other colors more vibrant in the process. Oil Paints by definition have a more finite and even dilution of pigment, so you can make truly fine lines and tiny creases on the model. There is no comparison in my mind. Another brilliant benefit to doing an oil wash is the built-in "do over" capability that you cannot find in acrylic paint. Too much wash applied? fine, just clean it off with some spirits, do it again. Too little applied? fine, add some more. Want to change something? Oil paints stay open far far longer than water-based colors, so you can go back in and change your paint job days later. GW Shades and acrylic based washes do not have this 'safety net' feature, and even after applying a GW shade for example, you'll have to re-paint your highlights since their vibrancy has been deadened. Not so with oil wash!
It's really not that big of a plunge to take - and you will not regret it!
Materials needed:
Gloss Varnish. This step is required before, and after, you apply oil paints and mineral spirits to your model. Oils and acrylics do not interact well with each other and without the varnish layers in between, the acrylic paints will be eaten and ruined over time.
Oil Paint. small tube of black oil paint, small tube of brown oil paint. These last forever, I'm still using oil paints I bought in college 20 years ago.
Mineral Spirits. Buy a can of odorless spirits. Not entirely odorless - you will still want to do your oil washes in a ventilated location with fresh air/fan nearby.
Palette / cups. You'll want multiple cups or a painter's palette with recessed bowls.
Q-tips or cotton swabs. Buy the bulk size - you'll need them.
Cheap brush. do NOT use your good brushes for oil washes. Set aside specific brushes to use only for oils. I use the cheap blue rimmed synthetic brushes you can find at your local art store.
Vinyl Gloves (optional) some people may not like to have black fingernails.
As mentioned above, the first step to preparing your model for an oil wash is a thorough gloss varnish. I use an airbrush for this as it's a big time saver and you get a consistent coverage. If you are planning to use an airbrush, make sure your nozzle is big enough. I bought a cheap airbrush ($25) with a large nozzle of 0.5mm that is dedicated to just doing varnish and primer. If you try to use varnish through a small 0.33mm or fine 0.25mm tip - prepare for frequent clogs and frustration; you'll need to dilute the varnish down to fit through those sizes, and thus you'll also need additional coats to make up for it.

Shiny and clean!
Next, prepare the oil wash itself. On these Knights, I'm going to be using a Black wash on the entire model except for the white/cream armor, where I'll be using a brown wash. The reason I want to do brown on the cream armor is that it will "warm" up the color and get it closer to the cream color of House Griffith. The base color airbrush application I did in step II went to far to pure white for my liking, so this will correct it a bit.
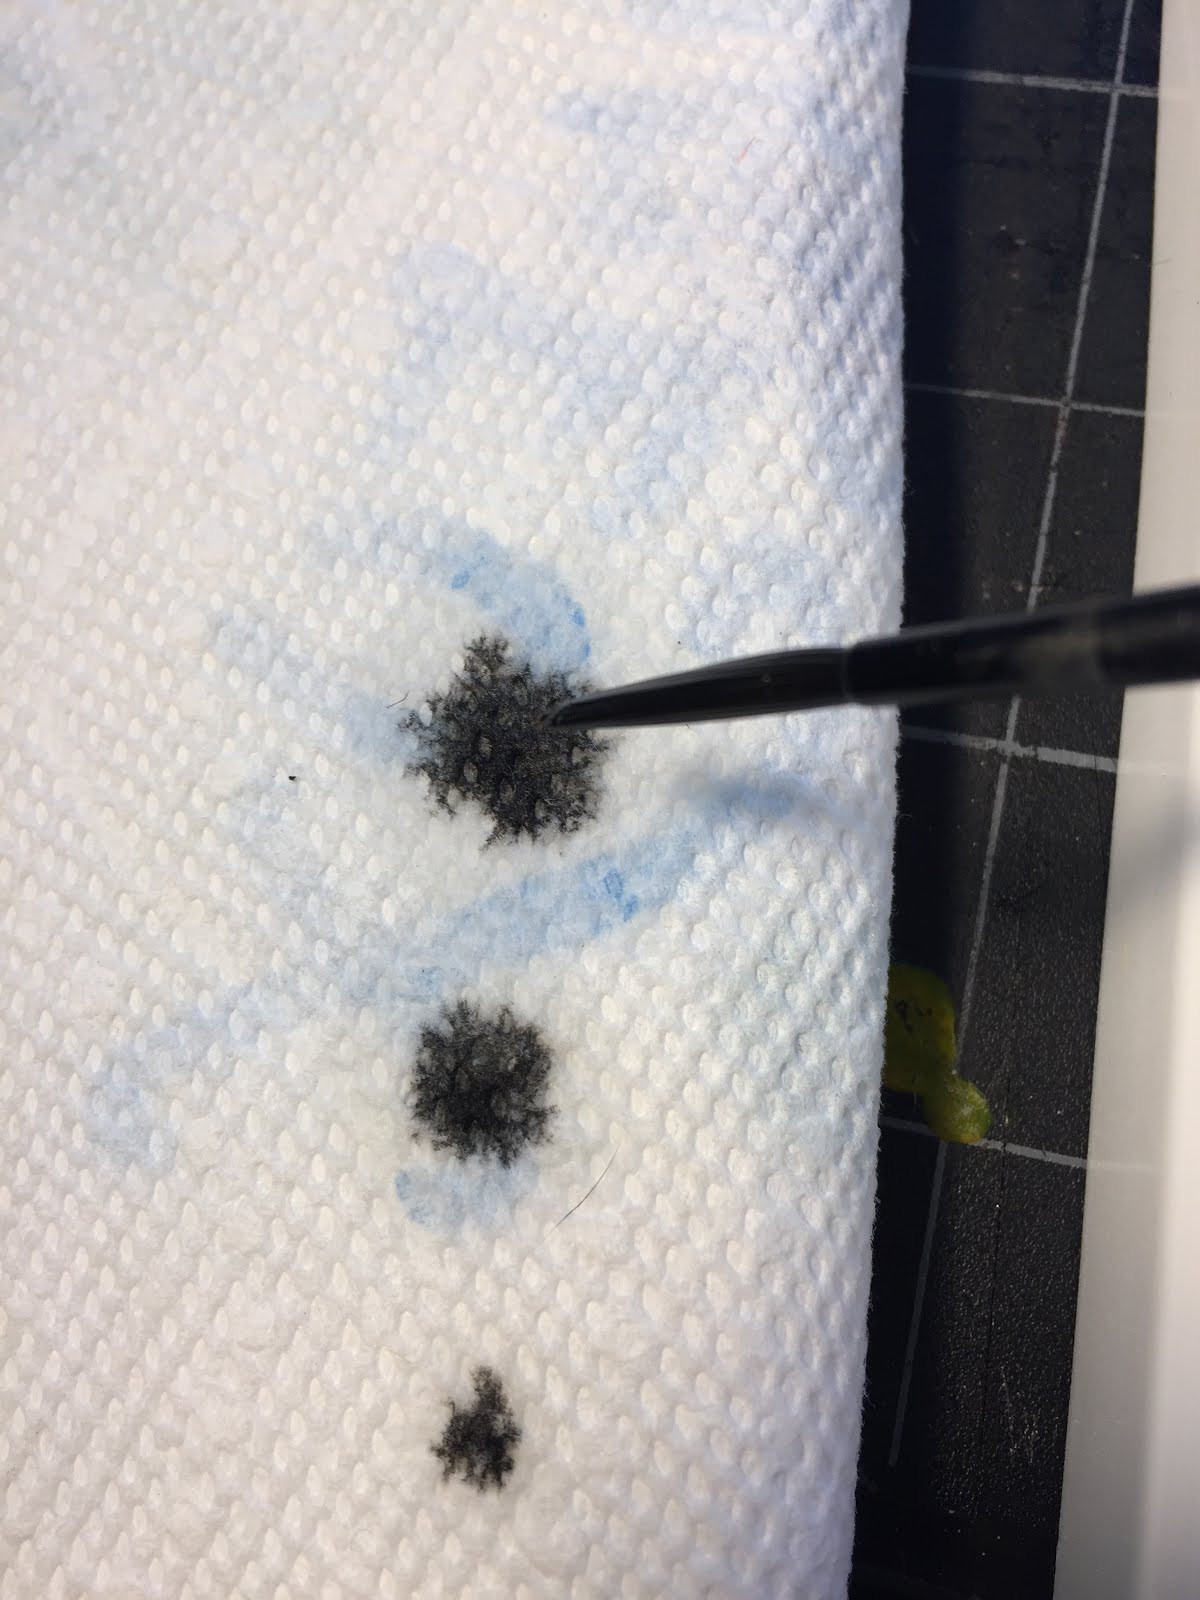
Preparing either color is the same method. Get a small dab of oil paint onto your palette or a cup, and slowly mix in mineral spirits as you mix and stir using a brush. Keep mixing until the daub of paint is fully diluted into the spirits. You want a consistency that's not too thin, not too thick - a test I use is to apply a loaded brush to a paper towel. The oil paint will spider outwards on the towel; I look for a consistency that results in a spidering roughly half the size between raw spirits and no spirits (see the paper towel below). This isn't an exact science, and you will be adding more paint & spirits to the mix as you go along and get low on wash, so don't worry too much about this to start.


Use the middle "50% spidering" consistency
Load the brush with wash, and apply it to a piece of the model. I recommend breaking down the model into as many small pieces as possible and doing a few at a time. These Knights are fully magnetized so I did a half dozen separate pieces at a time. Have a spare cup of spirits for washing out your brushes from time to time (do not put your oil brushes into water, it'll have no effect but to ruin your water).
Sometimes it's appropriate to do very exact, spot oil wash applications - in certain creases, on rivets only, etc. I prefer doing the entire model with a large brush. Not only is this much faster, I think it really brings the whole model together in one consistent level of shadowing. So, I quickly applied a heavy even coat to all pieces, only avoiding large pooled areas. Try to only paint on the wash with your brush once to any given area. Once the wash is on the model, don't touch that area again with your brush if you can avoid it. An empty brush will suck up the oil paint from the surface, and you'll need to re-do the area to make it consistent (note however that this sucking action is useful during our Erasing step later on).
When you take a look at what you've done and think the model now looks terrible, you know your oil wash is done!


Set aside and let the pieces dry for at least 20 minutes, preferably 30. You can leave them in this state for up to a few hours if needed. This is why doing large projects in small batches makes the most sense. Don't start applying the oil wash if you don't think you have time to also erase it in the same sitting (below).
Once the oil wash is 'medium' dry, meaning there are no more areas of liquid and the gloss has died down, we're ready for what I think is the most fun step of the process: the Eraser stage. Fill a small cup of raw mineral spirits, open your container of cotton swabs, and have a small pile of paper towels ready.
Dip a cotton swab into the spirits, and then dab excess onto the paper towels - you want a damp, but not dripping, amount of mineral spirits on the cotton swab. These cotton swabs become temporary paint brushes, for you to paint away or "erase" the oil wash that you've applied. Concentrate on only the high areas first, leaving the oil wash alone in the recesses and creases. The cotton swab will fill up with oil paint quickly - you will need to start a new one when this happens. I used up roughly 200 cotton swabs for the 5 Knights in this step!
Before & After:


It may take some practice, but take your time in "erasing" the oil paint from the surface and using the cotton swab as a reverse paintbrush. You are in effect revealing the finished Knight one small section at a time. This is the first time in the project where the model will finally look like its finished product - it is exciting, enjoy this process. Have the comfort in knowing that if you "erase" too much in an area, no problem - just apply some more wash, and do over.
For large areas, start in the middle and swab circular outwards, forcing the wash/spirits into the creases and shadows. Don't apply too much pressure, and swab from top to bottom generally. Think of this as a 'highlight' step - you want only the highest areas to be completely clean of the oil paint, lower areas are some % gradient. On the metal/gear areas, I left quite a bit more black wash to add variety. For those areas too small to be reached by cotton swab, or that require more detail, you can use a brush instead; filling and dabbing the brush with spirits in the same manner. Be careful though, the brush has a much more pointed direct surface, so its strokes will stand out.
Bonus: Depending on the level of weathering you have planned for your models, this is also a perfect time to apply rust streaks / grime streaks. Using a brush, you can pull oil streaks down the armor from the wash that is already there. For my Knights, I'm planning on only light weathering, so not many streaks/rust areas on these guys.


Slowly but surely the final Knight will emerge from the oil wash.
Caution: Until someone invents a better product than cotton swabs for this process, there is a downside that the swabs will tend to leave tiny threads of cotton fiber along your miniature, especially if it gets caught along a sharp or jagged area. This isn't a big deal, but you'll want to go back and remove as many of these as you can before varnishing again (otherwise they are permanent).
After the initial Erasing stage, let the model dry again. Go back in with the oil wash to apply any spot areas that need extra work. One great thing about oils is that you can go in and manipulate the paint hours or days later if needed. Once you're happy with the final look, let the model fully dry - give it a couple of days, or overnight with a fan blowing on it in a pinch.
After it's dried, you then apply another varnish layer over the whole model to seal in the oils (I chose satin this time for a bit less gloss). You can now safely apply acrylic paints again.


Now, the whole family has their highlights and shadows! Only a couple more steps to go: final highlights, decals, and minor weathering pigments.
Thanks for reading!