Showing posts with label coolminiornot. Show all posts
Friday, February 2, 2018
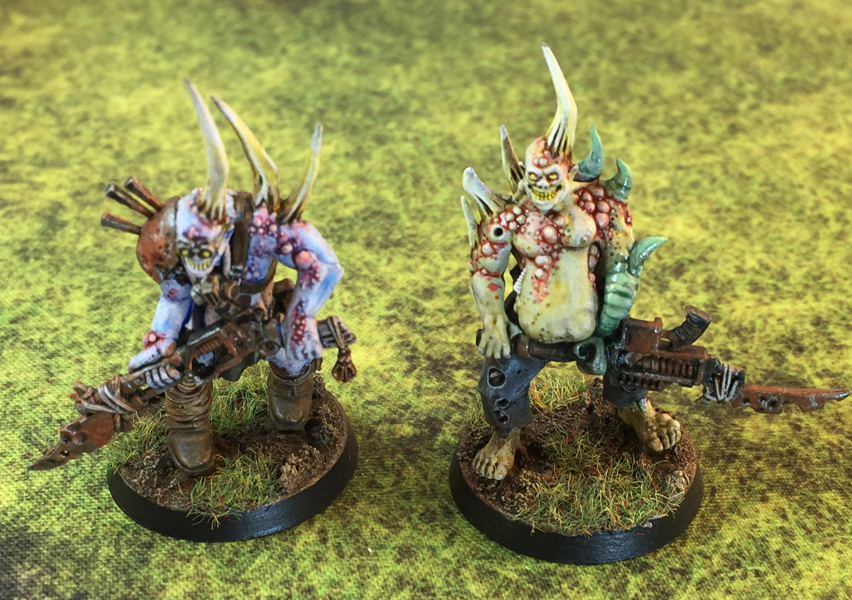
Nurgle Pox Walkers — Completed
Labels:
40k,
Airbrush,
Chaos,
Citadel,
coolminiornot,
How to Paint Warhammer,
Inks,
Mutant,
Nurgle,
Pox Walkers,
RMS,
Tutorial,
Washes,
Weathering
Wednesday, June 3, 2015
Dystopian Wars Scenery - Doctor Evil Mad Scientist Island of Doom Secret Volcano Base
I know it has been some time since I updated; things have been busy, and I simply haven't made much time for the hobby, which includes photographing and updating.
One of my friends/Dystopian Wars group member finally got an airbrush and can now experience the fun of using it first-hand, and the project he decided to dip into was a secret island base, with volcano and all.
Here are some WIP shots:
One of my friends/Dystopian Wars group member finally got an airbrush and can now experience the fun of using it first-hand, and the project he decided to dip into was a secret island base, with volcano and all.
Here are some WIP shots:
And finally, the completed work:
Can't wait to see it in action; seems like it could be a cool campaign piece for an evil Prussian scientist or perhaps something involving Antarcticans!
Labels:
1/1200,
Airbrush,
Badger,
Carrier,
coolminiornot,
DW,
Dystopian Wars,
Dystopian Wars Scenery,
Empire of the Blazing Sun,
EotBS,
Prussian Empire,
Scenery,
Spartan Games,
Tutorial,
Uncharted Seas,
Wargaming
Monday, February 11, 2013
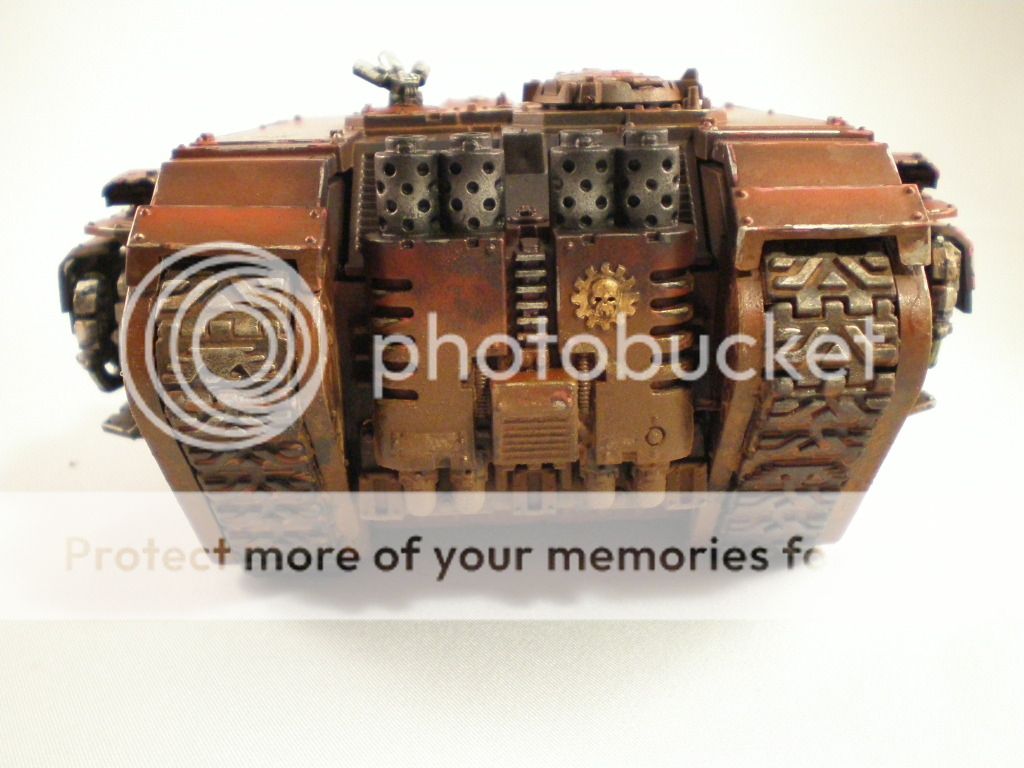
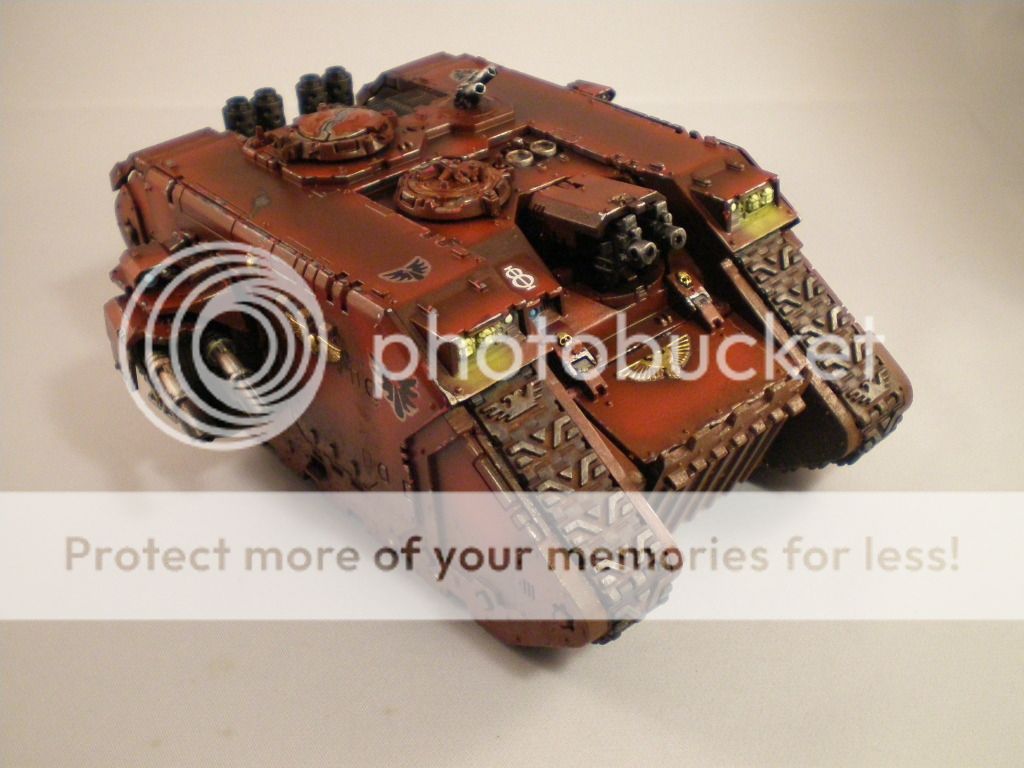
Blood Angels Land Raider - Finished Product
Finally, I've finished the Blood Angels Land Raider. Overall, I'm really happy with it, but admittedly, I sped through most of the hand-painted (analog) stuff.
Initially, this was meant to be a trial of using reds (incidentally, my favorite color to use) in my new airbrush, and indeed, this is the part I am most happy with. I thought that the shading and highlights worked-out great, and I am glad that I listened to several different sets of folks on different forums that suggested ultra-contrast, since a lot would eventually be obscured by pigments and other weathering elements.
When I put the pigments on originally, they looked perfect: the smoke on the exhaust; the rust on any necessary places; the mud and other dirt caked in the tracks and treads; the spattered mud and other stuff (ash, etc.) on the sides and low back. However, when I sealed them with the gloss (I used Krylon out-of-the can), it really soaked up the dry look of the pigments, and whilst it fixed itself well to the model, it also ruined the effect of dry dust.
Additionally, the decals are absolutely confounding; they just stick out perfectly (in a bad way), and I really need to find a way to make the decals look like they're one with the model, instead of something that is clearly stuck on. Any suggestions are welcome.
I rushed through most of the analog stuff, as I really wanted this to be an airbrush project. It could have been better had I focused on that, as a model cannot look good with good airbrush and poor analog, as they must coexist perfectly in a well-balanced gestalt.
Comments and criticism are welcome. Thanks for looking.
Labels:
40k,
Airbrush,
Badger,
Badger Renegade Krome,
Blood Angels,
Citadel,
coolminiornot,
Dark Angels,
p3 paints,
Pigments,
reaper master series,
RMS HD,
Sticky Textures,
Tank,
Vallejo Model Air,
Warhammer 40k,
Weathering
Thursday, July 5, 2012
Dreadnaught: Work in Progress
Labels:
1/1200,
Battleship,
Carrier,
coolminiornot,
Cruiser,
DW,
Dystopian Wars,
Empire of the Blazing Sun,
EotBS,
Games Workshop,
Japan,
Monster,
Naval Battles,
p3 paints,
Portland,
RMS,
RMS HD
Sunday, July 1, 2012
Empire of the Blazing Sun Carrier
Some updates: My carrier for a battle today.


Labels:
coolminiornot,
DW,
Dystopian Wars,
Empire of the Blazing Sun,
EotBS,
Japan,
Naval Battles,
p3 paints,
reaper master series,
RMS,
RMS HD,
Spartan Games
Wednesday, June 20, 2012
Dystopian Wars scratch-built scenery
Labels:
1/1200,
coolminiornot,
DW,
Dystopian Wars,
Empire of the Blazing Sun,
EotBS,
islands,
Naval Battles,
Prussian Empire,
Scenery,
Spartan Games,
Uncharted Seas,
Wargaming
Wednesday, May 30, 2012
Painting my Empire of the Blazing Sun Fleet
A post from the Spartan Community Forums, wherein I was asked about my mixture for the IJN color.
Thanks for asking; actually, I have received some PMs to this accord, as well, so I might as well put together a little bit about how I got that blue-grey.
One thing to note is that, initially, I looked for the blue-grey in stores, and most lines didn't have anything I liked: It was either too light or too dark, or too blue or too grey. Polly S has an IJN Blue-Grey, but to be honest, it's far too thin.
So, as mentioned in my other thread, I attempted to create something from scratch, but wanted it close to a historical IJN grey-blue. I mixed a RMS HD Ash Grey and RMS HD Military Grey in equal parts, and added a couple of drops of P3 Blue Ink (about 1 part ink to 50 parts paint — but mainly, I'd start with one drop, shake, and if it didn't look well, I'd another, ad nauseum, until desired consistency and opacity). To cleanly apply paint it should be thin enough that it would almost run off the brush, and the brush should be half-unloaded (onto a shirt, or towel), before use. The HD work great for this.

These are the paints I used to achieve this particular effect. The RMS HD are the best paints on the market for general use, because the pigment is high-density — it can be thinned and covers in a layer or two.
I ran out on my first run, meaning that half my fleet is painted with the first batch and half with the second; luckily, I was able to match them really close, so it's not even really that apparent. Furthermore, all units were painted with one pot or the other, to maintain consistency in case that the final product was not as consistent as I had hoped (but it was, luckily!)
Second batch (left) and first batch (right):

Paints are thinned on a wet pallet. While parchment paper works fine, I'm a real fan of the P3 papers (even though their paints are generally not-so-hot). I simply bought the paper, and passed on the $20 case, opting for a resealable plastic container, available at any supermarket for 1/50th of the price.

It's important to note, too, that paints (and especially at this still) will become just a saturated, lighter version of themselves, so in order to light for highlights (painted on) and final highlights (light drybrushing), I lighten with this:

Additionally, while I do thin with water (and it's the majority of what's in the wet pallet), I also use different recipes, contingent on how much time I need for wet blending on the mini. From the left, water, 1:1:5 mix of flow improver:drying retardant:water, with the right being the same, albeit mixed 1:1:10.

The RMS HD Ash Grey works great for those grey units (useful in any aerial Japanese "historical" navy), and for highlights, the Military Grey color works great; I thought about using this for my IJN Blue-Grey, but opted for the darker grey, instead. It is, however, the main color of my aerial forces.

Where the magic happens:

And finally, my current project. It's coming along quite well:

If you've checked my blog (located in my signature), you'll see what most of what I have been painting the last 20 years is 28/32mm. I think a change of perspective and painting-style is needed to paint 1/600 or 1/1200 scale, so that's something I am working on everyday.
Thanks for asking; actually, I have received some PMs to this accord, as well, so I might as well put together a little bit about how I got that blue-grey.
One thing to note is that, initially, I looked for the blue-grey in stores, and most lines didn't have anything I liked: It was either too light or too dark, or too blue or too grey. Polly S has an IJN Blue-Grey, but to be honest, it's far too thin.
So, as mentioned in my other thread, I attempted to create something from scratch, but wanted it close to a historical IJN grey-blue. I mixed a RMS HD Ash Grey and RMS HD Military Grey in equal parts, and added a couple of drops of P3 Blue Ink (about 1 part ink to 50 parts paint — but mainly, I'd start with one drop, shake, and if it didn't look well, I'd another, ad nauseum, until desired consistency and opacity). To cleanly apply paint it should be thin enough that it would almost run off the brush, and the brush should be half-unloaded (onto a shirt, or towel), before use. The HD work great for this.
These are the paints I used to achieve this particular effect. The RMS HD are the best paints on the market for general use, because the pigment is high-density — it can be thinned and covers in a layer or two.
I ran out on my first run, meaning that half my fleet is painted with the first batch and half with the second; luckily, I was able to match them really close, so it's not even really that apparent. Furthermore, all units were painted with one pot or the other, to maintain consistency in case that the final product was not as consistent as I had hoped (but it was, luckily!)
Second batch (left) and first batch (right):
Paints are thinned on a wet pallet. While parchment paper works fine, I'm a real fan of the P3 papers (even though their paints are generally not-so-hot). I simply bought the paper, and passed on the $20 case, opting for a resealable plastic container, available at any supermarket for 1/50th of the price.
It's important to note, too, that paints (and especially at this still) will become just a saturated, lighter version of themselves, so in order to light for highlights (painted on) and final highlights (light drybrushing), I lighten with this:
Additionally, while I do thin with water (and it's the majority of what's in the wet pallet), I also use different recipes, contingent on how much time I need for wet blending on the mini. From the left, water, 1:1:5 mix of flow improver:drying retardant:water, with the right being the same, albeit mixed 1:1:10.
The RMS HD Ash Grey works great for those grey units (useful in any aerial Japanese "historical" navy), and for highlights, the Military Grey color works great; I thought about using this for my IJN Blue-Grey, but opted for the darker grey, instead. It is, however, the main color of my aerial forces.
Where the magic happens:
And finally, my current project. It's coming along quite well:
If you've checked my blog (located in my signature), you'll see what most of what I have been painting the last 20 years is 28/32mm. I think a change of perspective and painting-style is needed to paint 1/600 or 1/1200 scale, so that's something I am working on everyday.
Labels:
coolminiornot,
Dystopian Wars,
Empire of the Blazing Sun,
EotBS,
Japan,
p3 paints,
reaper master series,
RMS,
RMS HD,
Spartan Games
Subscribe to:
Posts (Atom)