Showing posts with label Glazing Mediums. Show all posts

Wednesday, April 18, 2018

Myphitic Blight-Haulers

The arms race continues...... This time, Uncle Nurgle sends forth a trio of adorable and cuddly lil' Daemons: Myphitic Blight-Haulers, a.k.a. Stinky Puppies! Just look at their faces - they seem genuinely happy to see you, and they really want to play! Just be careful or they may leave a smelly surprise in your shoes, or accidentally turn your platoon into goo with their melta-cannon. Here boy! Go get the Astartes! Sick 'em! Gooood boyyyy!

Continuing the overall color scheme of this Death Guard warband, it is tempting to go overboard on the weathering and pestilence effects. But with the white background, less is more - the effects that are there really stand out. The overall ink wash color is something I dub "garbage juice" - parts black, brown, green and yellow ink. Yellow ink is the secret weapon - try some out, a little goes a long way on the final product.


Thursday, February 1, 2018

Nurgle Pox Walkers — Highlights, Details & Weathering


J's been continuing the work on the Nurgle Pox Walkers.  This time around, he's added some highlights, details, and other subtle effects, but assures me that — even though they already look better than tabletop ready — he's still not done!  There's some nice weather on the weapons, and details picked out enough that these look good at three inches away, let alone three feet! 

Check out the progress below, and as usual, feel free to ask if you have questions or comments.


Tuesday, January 30, 2018

Nurgle Pox Walkers


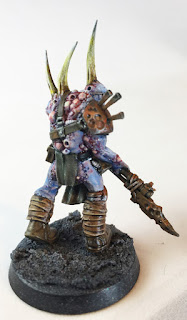
Here's a little preview of something J's been working on in the studio.  Apparently, his friend has quite the big Nurgle army that needs painting. This time around, the focus is on the base colors, and then using different colored inks/washes, to bring out the true colors of Nurgle.  

All paints were Vallejo and Games Workshop/Citadel, with the latter representing the majority of the washes. The base effects were achieved simply with the Vallejo sticky textures, specifically "Black Lava" from the jug.

I hope to post more soon — next stages will be toning down the glossiness with some matte coat, and then the highlights and details will be painted.

Enjoy, and as usual, feel free to comment if you have any questions or comments.


Friday, September 19, 2014

Micro Art Studios -- Best Bases Money Can Buy (Kickstarter)

If you read this blog, you'll note that I use Micro Art Studio's bases; they're cheap and work incredibly well.  Check the Kickstarter if you can:

http://www.kickstarter.com/projects/coolminiornot/coolminiornot-base-system-featuring-micro-art-stud

Sunday, August 11, 2013

Shading Metallic Gold


Welcome back! Just a quick-tip today about how to shade metallic gold successfully.

I love the NMM (non-metallic metal) effects, but I am not good at created them, so I enjoy creating the NMM with actual metallics and shades.

The wings, etc., are unfinished on this model, as this is a WIP and I am trying to use it to test this technique. 

Essentially, I laid down Vallejo Polyurethane Grey Primer, and then put down a base coat of VMA Mahogany. Following that, I put Vallejo Liquid Gold Alcohol-Based paint (Old Gold) everywhere, except for in the cracks/lines.

I did edge highlight a little by putting some VMC Silver and Brass, mixed 1:1 where it needed to be.

The fun part, however, was shading.  I used one large drop of Liquitex Glazing medium (I'd say it's around 10-15 "normal" drops worth), one drop of my water/flow-aid/retarder mix, and a size 3 brushload of the ink that I wanted to use to do the shading. The great part about this is that it can be painted on flat surfaces (and not move), or pooled-up. It's fast, clean and effective.

The down part (that I don't mind) is that you need to do successive layers. It's so subtle that you can barely make out that there is any color in the glaze, until the glaze dries.   I keep a hair-dryer (or, if I am taking a break, I put the mini in front of the air purifier I have in the room) handy to quickly dry things so that I can put down the next layer. All-in-all, it still only took around two hours to do the shading.

Leave comments when you can, and thanks for looking!