
Thursday, July 5, 2012
Sunday, July 1, 2012


Monday, June 25, 2012


Wednesday, June 20, 2012
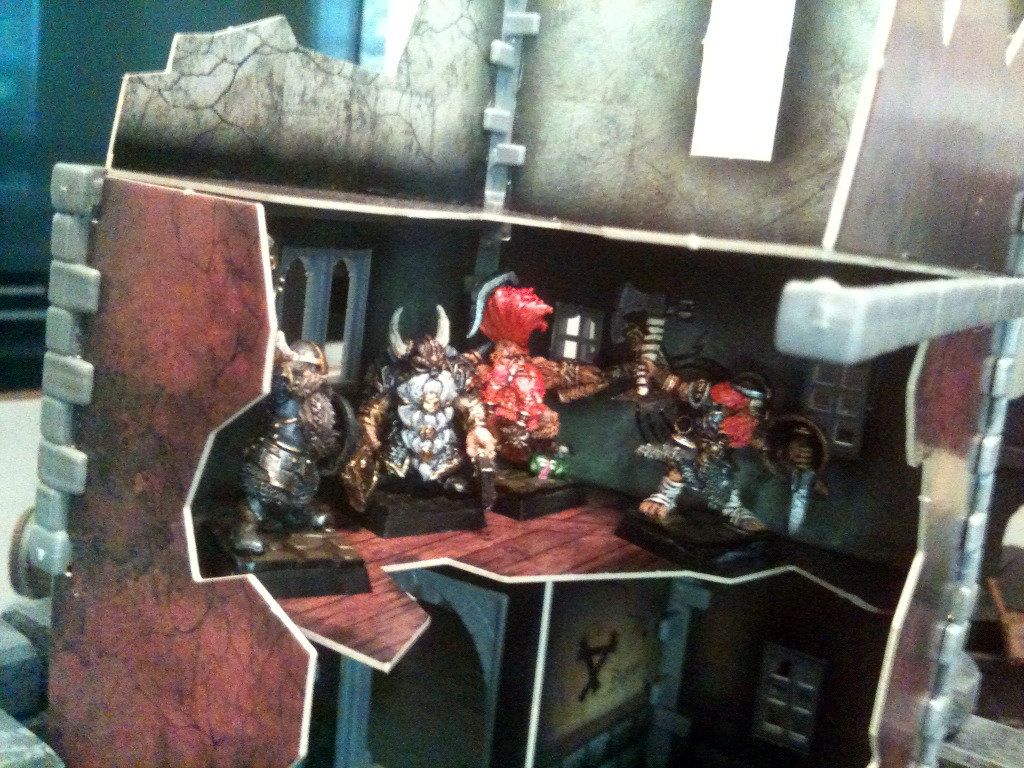
Dystopian Wars scratch-built scenery
Some very impressive work done with the cheapest of materials by a player in my tabletop group:


Wednesday, May 30, 2012
Painting my Empire of the Blazing Sun Fleet
A post from the Spartan Community Forums, wherein I was asked about my mixture for the IJN color.
Thanks for asking; actually, I have received some PMs to this accord, as well, so I might as well put together a little bit about how I got that blue-grey.
One thing to note is that, initially, I looked for the blue-grey in stores, and most lines didn't have anything I liked: It was either too light or too dark, or too blue or too grey. Polly S has an IJN Blue-Grey, but to be honest, it's far too thin.
So, as mentioned in my other thread, I attempted to create something from scratch, but wanted it close to a historical IJN grey-blue. I mixed a RMS HD Ash Grey and RMS HD Military Grey in equal parts, and added a couple of drops of P3 Blue Ink (about 1 part ink to 50 parts paint — but mainly, I'd start with one drop, shake, and if it didn't look well, I'd another, ad nauseum, until desired consistency and opacity). To cleanly apply paint it should be thin enough that it would almost run off the brush, and the brush should be half-unloaded (onto a shirt, or towel), before use. The HD work great for this.

These are the paints I used to achieve this particular effect. The RMS HD are the best paints on the market for general use, because the pigment is high-density — it can be thinned and covers in a layer or two.
I ran out on my first run, meaning that half my fleet is painted with the first batch and half with the second; luckily, I was able to match them really close, so it's not even really that apparent. Furthermore, all units were painted with one pot or the other, to maintain consistency in case that the final product was not as consistent as I had hoped (but it was, luckily!)
Second batch (left) and first batch (right):

Paints are thinned on a wet pallet. While parchment paper works fine, I'm a real fan of the P3 papers (even though their paints are generally not-so-hot). I simply bought the paper, and passed on the $20 case, opting for a resealable plastic container, available at any supermarket for 1/50th of the price.

It's important to note, too, that paints (and especially at this still) will become just a saturated, lighter version of themselves, so in order to light for highlights (painted on) and final highlights (light drybrushing), I lighten with this:

Additionally, while I do thin with water (and it's the majority of what's in the wet pallet), I also use different recipes, contingent on how much time I need for wet blending on the mini. From the left, water, 1:1:5 mix of flow improver:drying retardant:water, with the right being the same, albeit mixed 1:1:10.

The RMS HD Ash Grey works great for those grey units (useful in any aerial Japanese "historical" navy), and for highlights, the Military Grey color works great; I thought about using this for my IJN Blue-Grey, but opted for the darker grey, instead. It is, however, the main color of my aerial forces.

Where the magic happens:

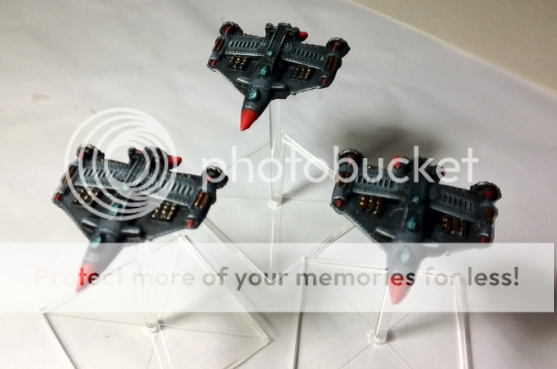
And finally, my current project. It's coming along quite well:

If you've checked my blog (located in my signature), you'll see what most of what I have been painting the last 20 years is 28/32mm. I think a change of perspective and painting-style is needed to paint 1/600 or 1/1200 scale, so that's something I am working on everyday.
Thanks for asking; actually, I have received some PMs to this accord, as well, so I might as well put together a little bit about how I got that blue-grey.
One thing to note is that, initially, I looked for the blue-grey in stores, and most lines didn't have anything I liked: It was either too light or too dark, or too blue or too grey. Polly S has an IJN Blue-Grey, but to be honest, it's far too thin.
So, as mentioned in my other thread, I attempted to create something from scratch, but wanted it close to a historical IJN grey-blue. I mixed a RMS HD Ash Grey and RMS HD Military Grey in equal parts, and added a couple of drops of P3 Blue Ink (about 1 part ink to 50 parts paint — but mainly, I'd start with one drop, shake, and if it didn't look well, I'd another, ad nauseum, until desired consistency and opacity). To cleanly apply paint it should be thin enough that it would almost run off the brush, and the brush should be half-unloaded (onto a shirt, or towel), before use. The HD work great for this.
These are the paints I used to achieve this particular effect. The RMS HD are the best paints on the market for general use, because the pigment is high-density — it can be thinned and covers in a layer or two.
I ran out on my first run, meaning that half my fleet is painted with the first batch and half with the second; luckily, I was able to match them really close, so it's not even really that apparent. Furthermore, all units were painted with one pot or the other, to maintain consistency in case that the final product was not as consistent as I had hoped (but it was, luckily!)
Second batch (left) and first batch (right):
Paints are thinned on a wet pallet. While parchment paper works fine, I'm a real fan of the P3 papers (even though their paints are generally not-so-hot). I simply bought the paper, and passed on the $20 case, opting for a resealable plastic container, available at any supermarket for 1/50th of the price.
It's important to note, too, that paints (and especially at this still) will become just a saturated, lighter version of themselves, so in order to light for highlights (painted on) and final highlights (light drybrushing), I lighten with this:
Additionally, while I do thin with water (and it's the majority of what's in the wet pallet), I also use different recipes, contingent on how much time I need for wet blending on the mini. From the left, water, 1:1:5 mix of flow improver:drying retardant:water, with the right being the same, albeit mixed 1:1:10.
The RMS HD Ash Grey works great for those grey units (useful in any aerial Japanese "historical" navy), and for highlights, the Military Grey color works great; I thought about using this for my IJN Blue-Grey, but opted for the darker grey, instead. It is, however, the main color of my aerial forces.
Where the magic happens:
And finally, my current project. It's coming along quite well:
If you've checked my blog (located in my signature), you'll see what most of what I have been painting the last 20 years is 28/32mm. I think a change of perspective and painting-style is needed to paint 1/600 or 1/1200 scale, so that's something I am working on everyday.
Tuesday, May 29, 2012


Dystopian Wars
Even though I haven't been posting much, I thought I'd take a detour and post some minis from the other game I am really into: Dystopian Wars.
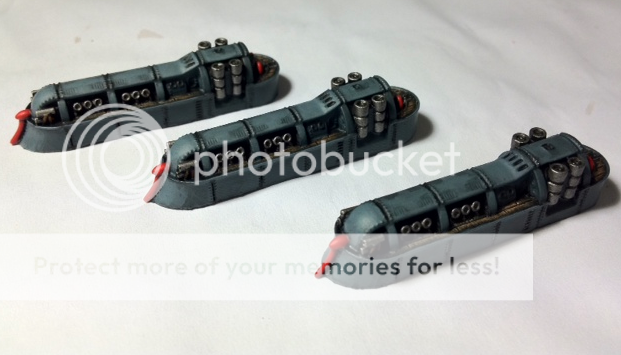
Below are my battleships, the Souryuu (惣流) and the Ayanami(綾波)from the 南極巡礼連合艦隊。
As mentioned in other blogs, my Dystopian Wars fleet is painted to be viewed from the distance of about three feet, and from the top.


Below are my battleships, the Souryuu (惣流) and the Ayanami(綾波)from the 南極巡礼連合艦隊。
As mentioned in other blogs, my Dystopian Wars fleet is painted to be viewed from the distance of about three feet, and from the top.


Saturday, May 26, 2012
Progressive Results: May 26th, 2012
Current Standings
MS 2W-1L-0D
JK 1W-2L-0D
MG 1W-1L-0D
Game 1 (JK vs. MG - Treasure Hunt - JK Victory by Forcing Rout)
MG Hound OOAs JK Francis the Dreg
JK Vampire OOAs MG Hound
JK Dire Wolf OOAs MG Hound
MG Hound OOAs JK Zombie
JK Vampire OOAs MG Gor #1
MG Centigor OOAs JK Zombie
JK Monga OOAs Grak (Bestigor); Grak gains hatred of Mongo.
Game 2 (JK vs. MS - Street Fight - MS Victory by Forcing Rout):
Random Events: Acid Rain & Giant Spider
Acid Rain OOAs JK Ghoul.
Acid Rain OOAs JK Francis mk2
Acid Rain OOAs JK Ghoul
MS Engineer Dimrond OOAs JK Zombie
Spider OOAs JK Dire Wolf
JK Vampire OOAs MS Engineer Dimrond
MS Clansman OOAs JK Zombie
Game 3 (MS vs. MG - Treasure Hunt - MG Victory by Forcing Rout)
Random Event: Eerie Apparition
MG Hound OOAs MS Clansman
MG Centigor OOAs MS Slayer
Game 4 (MS vs. JK - Wizard's Mansion - MS Victory by Forcing Rout)
Random Encounter: Slayer Finds Wyrdstone & Screaming Building
Igor OOA by fall
Vampire OOA by fall
MS Leader Hagrin OOAs JK Francis mk2
MS Slayer OOAs JK Mongo Dred
MS gains major treasure haul
Wednesday, March 21, 2012
Rules Changes v.1.1
In addition to the rules changes as set-forth in the post below (Rules Changes v1.0), we're also wanting to implement the following changes, as well. This is to make gameplay more fun, more intuitive, and faster.
Climbing (this is taken from the much-superior "Deathsquads" 40k game):
A player has three options, and must declare one for each model. Safe Climbing, Standard Climbing, or Reckless Climbing. At no point may the player elect to change climbing "modes" midway through a climb that has already started.
Safe Climbing: If a model starts in base-to-base contact with a wall, it may climb one level or half his movement, with no initiative roll. No additional movement, shooting or hiding is allowed. Obviously (but we'll state it anyway), a model must be able to climb in the first place (i.e. War-dogs, etc., are exempt).
Standard Climbing: A model may move, climb and move up to his Movement value, if it passes a single Initiative test. If he fails, his movement stops at the base of the wall. He is unable to Climb this turn. Shooting or hiding are allowed after a successful Climb, with normal penalties. Should the model have a move, and be climbing from a part that's already 2"+ from the table surface, the failed initiative test would indicate a fall from the point it started at, not the destination.
Reckless Climbing: As running, a model may move, climb and move up to twice his Movement value. The end destination must be declared before any test is taken. An initiative test must be passed for each 2" climbed. Any failure causes the model to fall from the top of his intended destination. Follow normal falling rules. Hiding or shooting are not allowed after a successful Reckless Climb, similar to "Running."
A model may not Reckless Climb if there is an unoccupied enemy model within 8".
Combat Initiatve and Strike first/Strike Last
Models in Combat strike in order of Initiative. Models tied for initiative strike 'simultaneously' - they both are allowed to make their attacks, regardless of the outcome.
Strike first grants a model an Initiative value of 10 or cancels out Strike Last, allowing to model to use his normal Initiative.
Strike Last grants a model an Initiative value of 1 or cancels out Strike First, causing him to strike at his normal Initiative value.
Standing up from knocked down causes a model to strike at an initiative value of 0, regardless of any instances of strike first or strike last.
Parry
A model with a weapon that grants parry may try to parry one of his enemy's close combat attacks by rolling a D6, and adding his WS. If the total is higher than the sum of his opponents' best to hit roll + WS, that attack is parried. One attempt per Turn is allowed, and the attack with the highest value (in the case of multiple attacks) must be the one parried.
Subscribe to:
Posts (Atom)